DocsBlender manualUser InterfaceNodes
Arranging Nodes
From the Blender 5.2 LTS Manual by the Blender Documentation Team, adapted for Angelo · CC BY-SA 4.0
Snapping
Snapping aligns the position and size of nodes to the background grid. This feature allows nodes to snap to a grid, ensuring that node layouts remain clean and visually aligned. Snapping can be toggling the snap icon (/) in the editor’s headers or toggled temporarily while transforming nodes by holding Ctrl.
Auto-Offset
When you drop a node with at least one input and one output socket onto an existing connection between two nodes, Auto-offset will, depending on the direction setting, automatically move the left or right node away to make room for the new node. Auto-offset is a feature that helps organizing node layouts interactively without interrupting the user workflow.
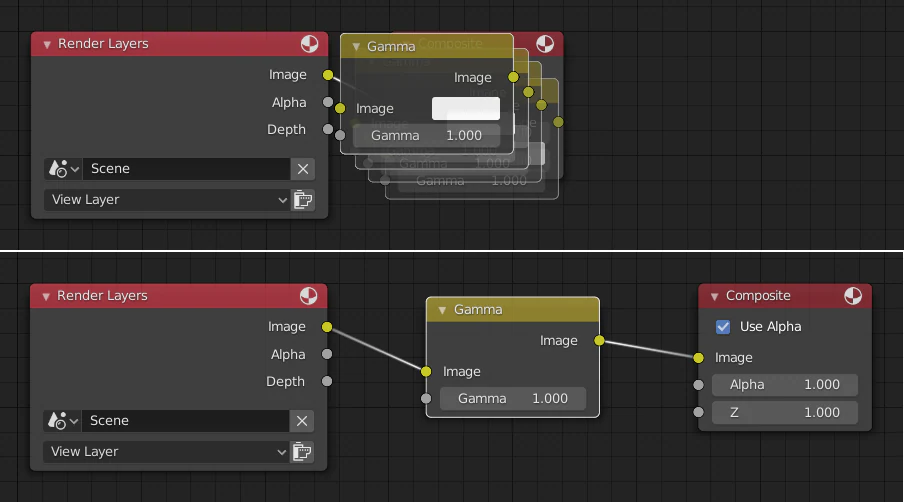
Auto-offset is enabled by default, but it can be disabled in the Preferences.
You can toggle the offset direction while you are moving the node by pressing T.
The offset margin can be changed using the Auto-offset Margin setting in the Editing section of the Preferences.